
Atari STE Acquisition
What have I done! 😳

So. I saw this #Atari 520 STE advertised not too far away at a price I couldn’t pass by.
This is the original pic from the listing.
I spotted 2 Zipstick joysticks and I was sold. Those are worth most of what I paid for this bundle on their own in my eyes.

I’m home from picking it up now. Here is the beastie.
Once I get myself organised I’ll explore the treasure with you all.

Before I start…
@GothmogPlays won’t like the sight of this hideous piracy of his favourite game 🤣

OK. Here we go!
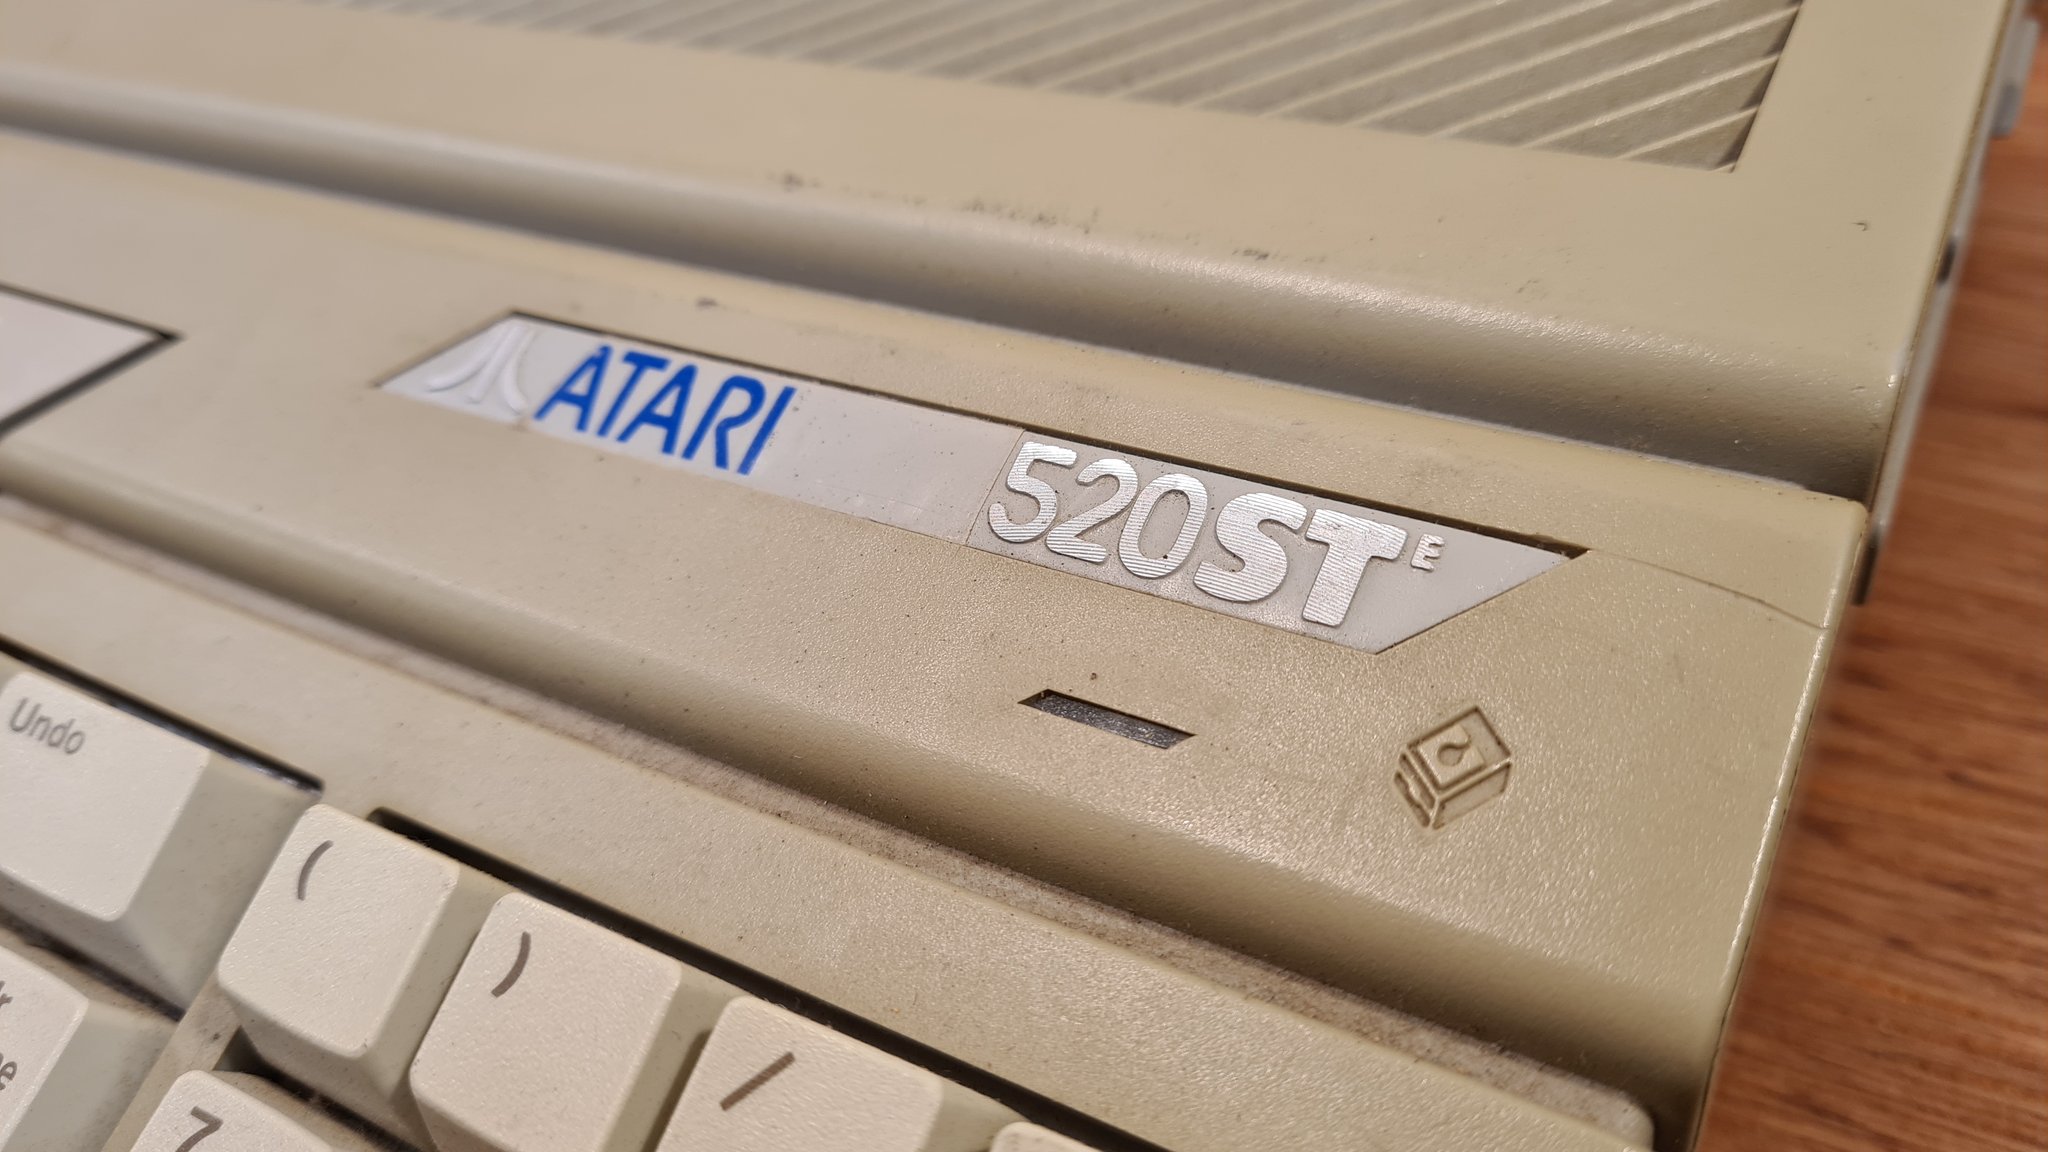
An Atari 520 STE in grubby greenish grey.
I should point out before we go any further that BITD I was a die hard Amiga fan. I didn’t even know anyone with an ST. This might be the first time I’ve even touched one!

Everything unpacked. I’ll put aside the software and joysticks for separate threads and concentrate on the machine itself.
Although I’m really looking forward to getting those Zipsticks restored 😁

Well this is odd. The box is for an STFM. It’s in terrible condition, One for the bin I think.

At first glance the case and keys are in decent condition.
There’s a gouge near the badge, not much I can do about that. Really dirty all over, the kind of dirty you get when something is stored somewhere damp. 😳


Everything looks in order on each side. I assume there was a cover for that expansion port that’s missing?
Floppy drive dust cover might have spared it from certain doom

Missing a screw in the base so the top is loose in this corner.
A couple of extra joystick ports. Plugged into the printer port. OK then!
A little rust on the metal at the back. But less than I feared.
What are the chances that this is working?

Here’s a model and serial number for those interested.

And the first actual problem. That left joystick port looks trashed. I wonder if that’s why it has the printer port adapter?
Next…
What’s it look like inside?

I have to show you the feet. One is in perfect condition, then the others are each worse than the last. They feel like chewing gum.

We’re in!
This thing is built like a tank! It’s literally armour plated!
So much filth!
Nice that the keyboard connector is keyed.

The back of the keyboard. Quite a lot going on here. Joystick ports, that dodgy one will take some repairing. Or, it might just want those pins pushed back through

Power supply revealed!
Looks in excellent condition. I suppose these get replaced with pico supplies or something similar?

No idea how much memory we have going on here. I’ll guess its been upgraded to 1mb. Could be more?

Cover removed from the rear of the floppy drive.
Nothing very exciting.

Turned out over to remove the 3 screws holding the floppy and this fell out. I think it’s from the power supply feet. It’s actually missing two screws. Fingers crossed I find the other one. One of the ones still in place was very loose

Beneath the floppy drive done motherboard revealed.
Couple of chips there not filling up their sockets! Reminds me of my Amiga 1200 rom sockets. I managed to kill my first set of wb 3.1.4 roms by placing them in the wrong end of the sockets 😳

Ahhh. Mystery solved. That’s where the wandering screw came from!

Tabs straightened.
Cover wouldn’t come off still. Psu is on the way…
Ahhh! The whole thing lifts out of the case!
I’m learning stuff!

Thank you for the warning @KempeneerVan this thing had blatantly been sharpened by a Japanese knife maker. I would have sliced myself for sure.

At last the motherboard!
It’s in excellent condition! I can’t see any corrosion or signs of leaking capacitors, or spill damage anywhere!
What a lovely motherboard! Crazy bondage going on. Go faster resister array stripes. HUGE capacitors!
I LOVE IT! 😂

WHAT IN THE HOLY HELL IS THAT!?
It’s like I’ve walked in at an awkward moment and any second now they’re going to notice me standing there and start frantically covering up their… Bits…
Is this some memory mod? Its close to the sims.

Time to start plugging things in.
Not that kettle lead though. If you ever see the last layer of insulation on mains cabling then it’s time to either repair that lead or bin it.
Rcd plugged in on testing helps put my mind at ease.

A light on the keyboard!
Only have an RF connection so retuning the TV…
It’s found 2 channels!
EXCITING!

YES!
YES YES YES YES YES!
I bloody grinning my face off right now! This was A STEAL!
Better plug a mouse in and see whats what!

The mouse or the mouse port is intermittently faulty. But I’ve got it working enough to know I can fix whatever wrong.
I’ll wrap it up for tonight at this point. It’s getting late and I need my ugly sleep.
Tomorrow or it back together and see if it will read a floppy 😁

Almost forgot! I popped one of the memory sticks out. Says 256 x4 in the top right. So this is 1mb? My money is this has 2.5mb with the original 512k in the other 2 slots. I couldn’t remove those, for fear of breaking the slots.

A better view of what I’m sure is a 256k stick. Paging @ctrl_alt_rees for confirmation.

The sun came out so I dumped the case in the garden. Still needs a good clean but the sun will help that horrible green tinge

Can you tell which bit I’ve cleaned?
🤔
It’s filthy. Really covered in grime.

Already looks a hundred times better. A few sunbed sessions and this will look factory fresh 😁

Still has the protective film on the badge!

The keys really need cleaning. Some baked in hand cheese that’s going to impede the suns bleaching effects.

No springs! Excellent 😁
Very easy keyboard to disassemble

WARNING
DO NOT INSPECT THESE PICTURES ON A FULL OR EMPTY STOMACH!
GRAPHIC GROSSNESS
🤢🤮

Warm soapy water. I’ll scrub each one throughout the day as I get time. Then they will join the rest of the case in the sun to bake back to the correct colour

Scrubbing time!

I’m chasing the sun around the garden.

Just noticed one of the keys is down. By strange coincidence I was watching a @thejanbeta video where he had the exact same problem. Too much of a coincidence! It’s actually the top half of the return key. I don’t think it’s supposed to have a rubber dome under it?

The sun is gone for today. And the case looks a lot better than it did yesterday! I think I’m happy to put this back together and give it an occasional day in the sun to finish it off the next time the sun comes out.
It will mean I can’t do the base and top at the same time.🤷

Starting with the keys. I’m nervous of losing any of them so they are best off back where they belong.
They’ve cleaned up really well. And the dose of starlight they got today has pretty much returned them to stock colour.

A broken standoff under the fdd mounting. It’s not important and I could just ignore it. But…
A little cyanoacrylate and a fast activator soon put it back in good order.

This is where that standoff is located, under this beautiful brass spacer. In so impressed with parts of this computers build quality. Other parts are not quite as impressive though 😜

Putting it back together was just like taking it apart but the other way round and a whole lot less dirty.
And doesn’t she look gorgeous?!
After one day in the sun I’m almost happy with the colour. No peroxide and it’s risky chances. The back is still a little green but that’s ok

And, as a huge bonus, it still works 😂
Now the fdd is connected the correct icons are displayed (@ctrl_alt_rees is that what you were looking for?)
But… Will it read a floppy?
Surely not?

Well, hell yeah!
Arrghh. Copy protection!
But wait a sec. I’ve got the manual!
Happy days!
Plugged in a Zipstick and away I went!

So what next?
I’ll have to put this away for a while and get other projects moving. But the priority for this Atari is to repair the joystick ports. I may end up putting a gotek in later, but that’s not so interesting.
These joysticks will need restoring.
Anyway. Laters! 😁👍
